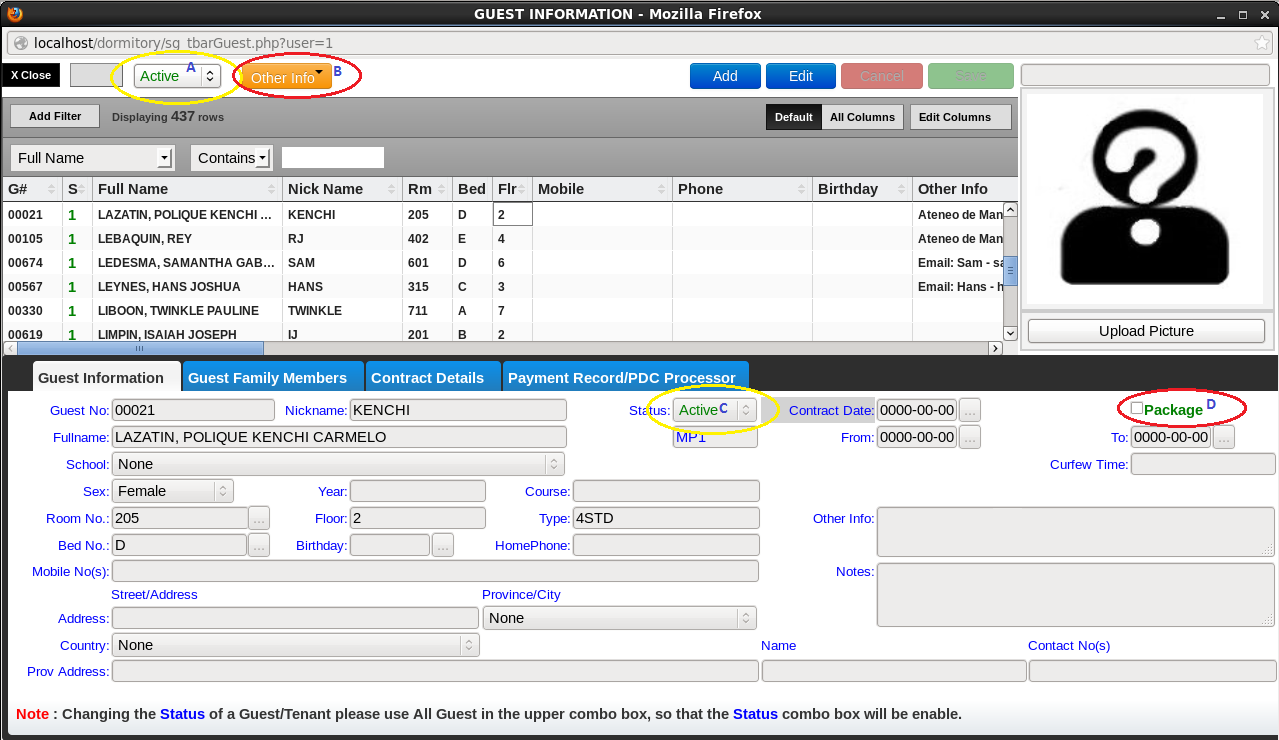
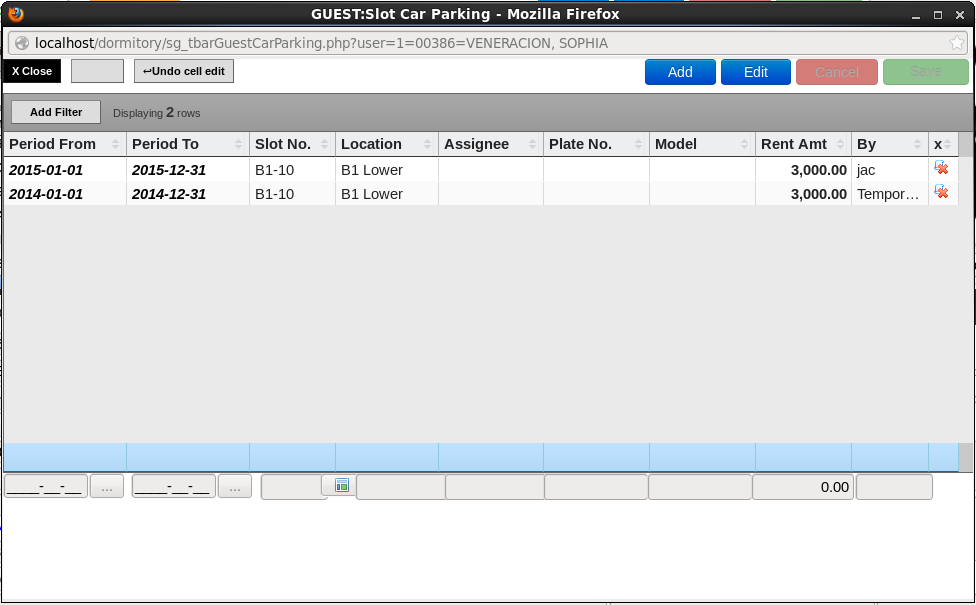
Figure 1.Guest Information A.Status selector. This is usually for filtering. Use this if you want to change the status of the guest/tenant. B.Other Info. is for the entry of 1.Car Park and 2.Miscellaneous. Figure 1.1.Guest Carpark Entry
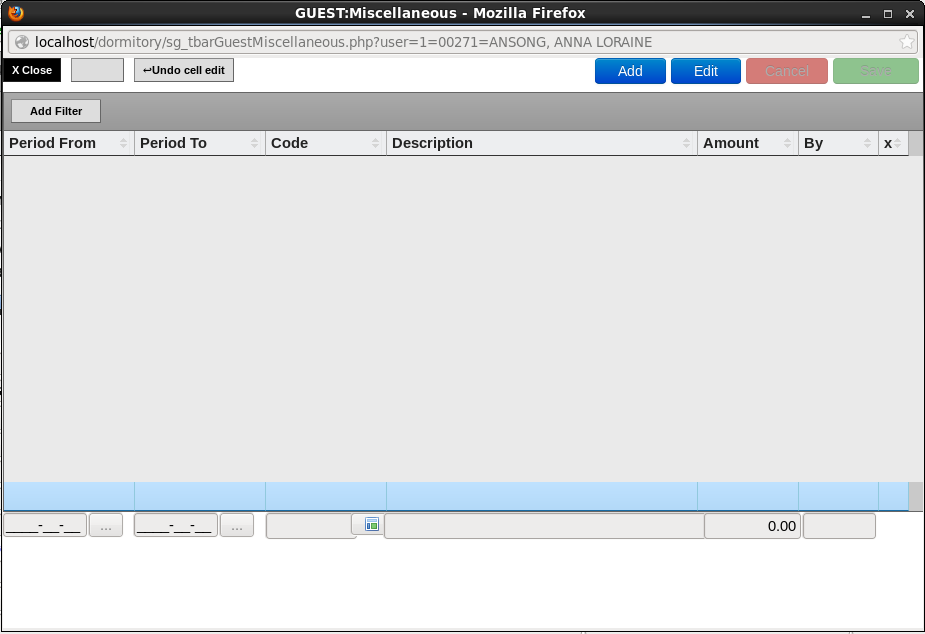
Figure 1.2.Guest Miscellaneous Entry
C.Status of the guest/tenant. You can change the status of the guest/tenant here provided that the combobox is set to All Guest option in the A. combobox. D.Package is for the guest that the bill of utilities is included in the rental billing. Please check this checkbox if it is in package so that it will not make invoice billing in the utilities, but still it will make a computation.
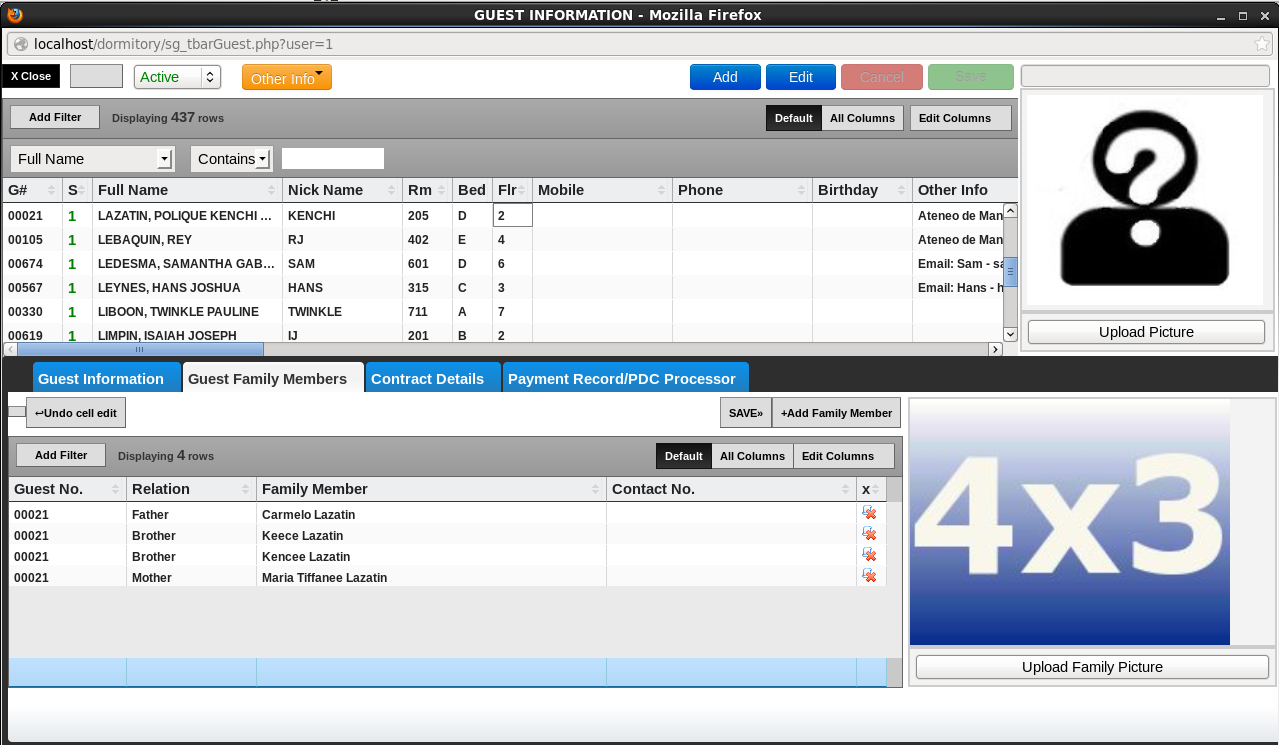
Figure 2.Guest Family Members Entry of Guest Family Members. You can also upload family picture. Please use the picture size indicated in the Upload Family Picture.
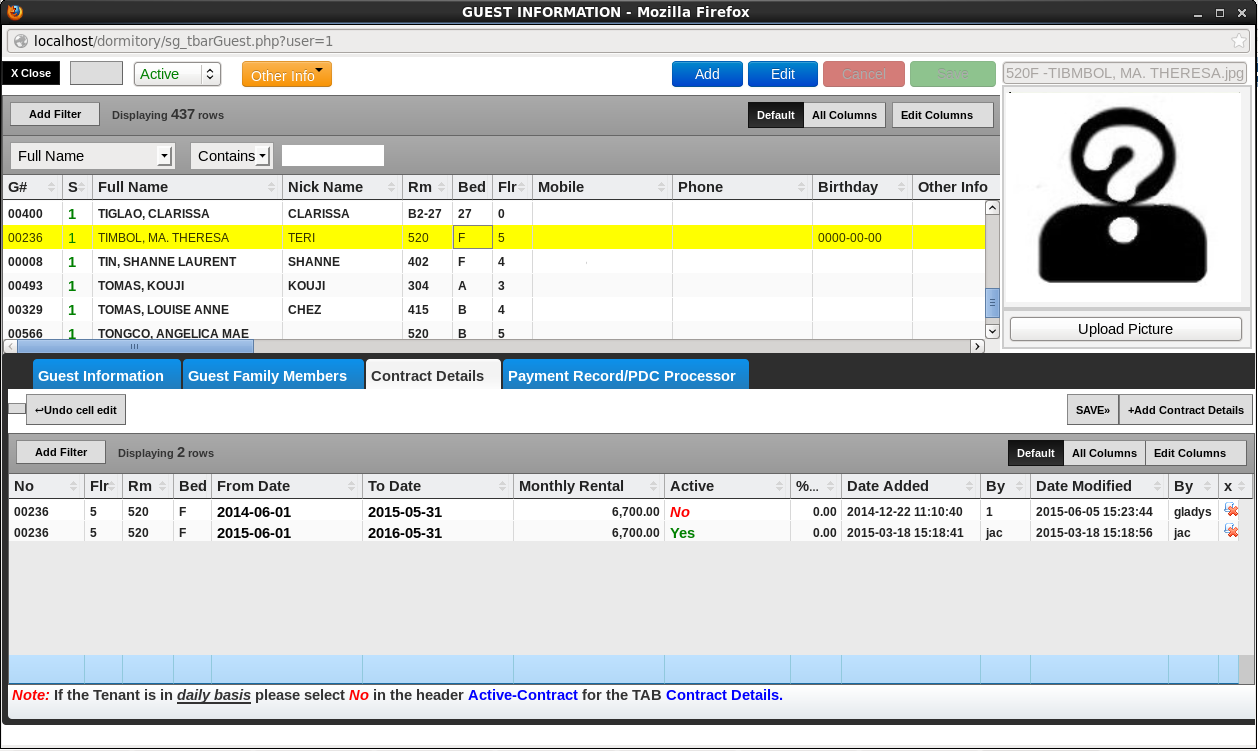
Figure 3.Guest Contract Details Entry of Guest Contracts. Please do not delete any contract even if the contract is change in the middle of stay. If new contract supersede the previous just change grid column of Active to No option. This is to preserve the history of every contract. Trapping of date contract is very importal, so in case you made a duplicate the system can trap it to disallow the entry. Duplicate date contract is allowed if you change the Active to No option.
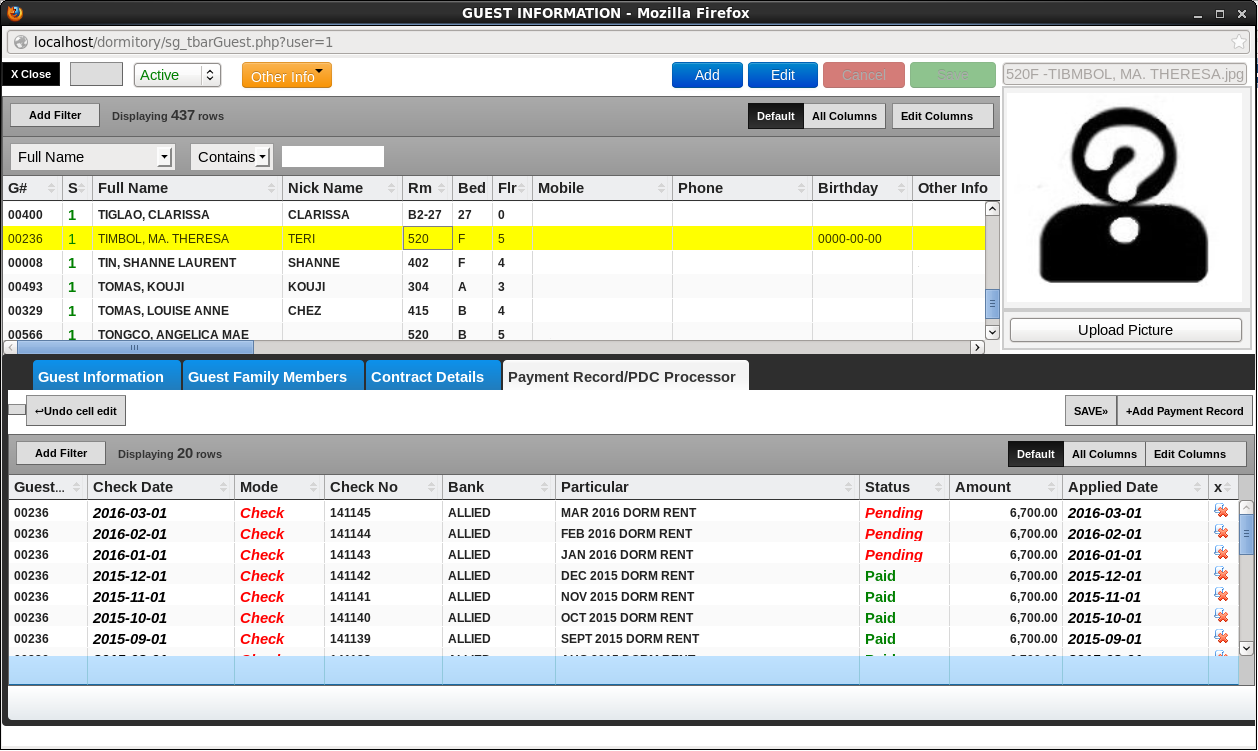
Figure 4.Guest Payment Record/PDC Processor Entry of Guest Payment Record/PDC Processor. The column Status and Applied Date in the grid is very important. Status of the PDC must be Pending upon entry. Applied Date is the date where the PDC is applied. Once the Dorm Rental is process the system will detect if the period of the billing date of Dorm Rental has an applied PDC. If the system detect it will automatically prepare a payment of the invoice billing processed. Status of the PDC will change from Pending to Paid once the POST button is pressed in the Post-Dated Module found in the Toolbar. Be sure to prepare an Official Receipt for every payment made for every processed invoice.